
Your cookies, your rules!
Welcome, my fellow cookie enthusiasts, to the ultimate guide on freezing chocolate chip cookie dough. If you’re anything like me, you believe that there should always be a stash of cookie dough in your freezer for those moments when the craving hits. But let’s face it, sometimes life gets in the way, and we can’t immediately bake a fresh batch of cookies.
Fear not! Freezing your cookie dough is a game-changer that allows you to satisfy your cravings at a moment’s notice. So, grab your apron, preheat that oven, and let’s dive into the wonderful world of freezing chocolate chip cookie dough!
Choosing the Right Dough Recipe for Freezing
Oh, the possibilities when it comes to cookie dough recipes! But not all doughs are created equal when it comes to freezing. It’s like picking the perfect dance partner; you need someone who can keep up and won’t step on your toes.
When selecting a recipe for freezing chocolate chip cookie dough, look for ones that have a higher fat content. The extra fat helps maintain moisture and prevents the cookies from drying out during freezing. Recipes that include a combination of butter and shortening tend to freeze exceptionally well. And remember, your taste buds deserve the best, so opt for quality ingredients like real butter, fresh eggs, and premium chocolate chips.
Once you have your favorite chocolate chip cookie dough recipe, consider making a few adjustments to make it freezer-friendly. Adding a touch more flour can help maintain the dough’s structure during freezing and prevent it from spreading too much while baking. It’s all about finding that perfect balance between indulgent gooeyness and well-formed cookies.
Preparing the Cookie Dough for Freezing
Preparing the cookie dough for its icy slumber is a crucial step to ensure optimal results. Think of it as giving your dough a cozy blanket before tucking it into the freezer.
Start by meticulously measuring and mixing all the ingredients, ensuring they’re well incorporated. We don’t want any rogue pockets of flour or lonely chocolate chips ruining the harmony. Use a stand mixer, a trusty wooden spoon, or even your hands to create a smooth and consistent dough. Embrace the sensory experience as the sweet aroma of vanilla and the delightful stickiness of dough fill your kitchen.
Next, shape the dough into individual portions. I like to create uniform balls or use a cookie scoop to ensure consistent sizing. Not only does this make portion control a tad easier, but it also aids in even baking later on. Plus, when you have pre-portioned dough balls, you can bake as many or as few as you desire at any given time. Flexibility at its finest!
For safekeeping, choose appropriate containers for freezing. Opt for airtight containers or freezer-safe resealable bags. Label them with the date of preparation because, let’s be honest, we’ve all found a mysterious container in the freezer at some point and wondered, “Is this from last month or last year?” Save yourself from such perplexing mysteries.
Optimal Freezing Techniques
Now that our dough is ready to embrace the cold, let’s talk about freezing techniques. Remember, we want to ensure our dough stays in prime condition until the cookie craving strikes.
Flash Freezing: A Quick and Efficient Method
Flash freezing is like the superhero of freezing techniques—fast and efficient. To employ this technique, arrange your pre-portioned dough balls on a baking sheet lined with parchment paper. Make sure they’re not touching to prevent any doughy entanglements. Pop the baking sheet into the freezer and let the magic happen. Once the dough balls are firm to the touch (usually takes around 1-2 hours), transfer them into your chosen freezer-safe container.
Air-Tight Packaging: Preserving Flavor and Texture
Remember, we want to keep the flavors intact and the texture on point. For that, make sure to use air-tight packaging when freezing your cookie dough. This shields the dough from unwanted odors and prevents freezer burn, which can lead to subpar cookies. Nobody wants sad, freezer-burned cookies, right? Wrapping each dough ball individually in plastic wrap or using separate freezer bags for each portion works wonders.
Proper Labeling and Dating
Ah, labeling—our humble savior when it comes to freezer organization. Don’t underestimate the power of a well-labeled freezer. Write down the date of freezing and a brief description of what’s inside the container. It might seem like an unnecessary step now, but trust me, you’ll thank yourself later when you can identify the dough at a glance without having to play a guessing game.
To help you keep track of your frozen cookie dough inventory, here’s a handy markdown table that you can print and fill in:
| Date of Freezing | Description/Notes |
|---|---|
| mm/dd/yyyy | Chocolate chip dough |
| mm/dd/yyyy | Double chocolate dough |
| mm/dd/yyyy | Oatmeal raisin dough |
| mm/dd/yyyy | Peanut butter dough |
| mm/dd/yyyy | White chocolate macadamia |
Now that we have our freezer-friendly dough all tucked in and labeled, let’s move on to the exciting part—freezing and thawing procedures!
Freezing and Thawing Procedures
Freezing Cookie Dough Correctly
When it’s time to freeze our precious dough, we want to do it right to ensure the best possible outcome when we finally bake those scrumptious cookies. Here are some important steps to follow:
- Flash freeze the pre-portioned dough balls on a lined baking sheet before transferring them into containers or bags. This prevents them from sticking together and makes it easier to grab the desired amount when you’re ready to bake.
- Make sure the containers or bags are air-tight to prevent any moisture loss or absorption of unwanted flavors.
- Remove as much air as possible from the bags before sealing them. You can use a straw to suck out excess air or invest in a vacuum sealer for ultimate freshness.
- Place the filled containers or bags in the coldest part of your freezer, away from strong-smelling foods. We don’t want our cookies to have an identity crisis and end up tasting like leftover garlic bread.
Thawing Cookie Dough Safely
The time has come—the moment we’ve been waiting for. But hold your horses! We need to thaw our frozen cookie dough properly to maintain its integrity and ensure perfect results. Here’s how:
- Transfer the desired number of dough balls from the freezer to the refrigerator. Allow them to thaw overnight or for approximately 24 hours. This slow thawing process ensures even defrosting and avoids any drastic temperature changes that can affect the texture.
- If you’re in a rush and need your cookies ASAP, you can use the quick-thawing method. Place the frozen dough balls on a baking sheet and let them sit at room temperature for about 30 minutes to an hour. Just be cautious not to let them become too soft; we want them to hold their shape while baking.
- Avoid thawing the dough in the microwave or by using hot water, as these methods can cause uneven thawing and potentially start the baking process prematurely. We want to ensure our cookies bake to golden perfection.
Recommended Thawing Times
While the overnight thawing method is generally the safest and most reliable, I know there are moments when patience is in short supply. Here’s a general guideline for quick-thawing times:
- Small to medium-sized dough balls: approximately 30 minutes to 1 hour at room temperature.
- Larger dough balls or dough logs: approximately 1 to 2 hours at room temperature.
Remember, these are estimates, and it’s always best to monitor the dough’s consistency during thawing. We want them to be pliable but not overly soft.
Now that we’ve mastered the art of freezing and thawing cookie dough, let’s explore how to extend the shelf life of our frozen treasures!
Extending Shelf Life of Frozen Cookie Dough
We all want our frozen cookie dough to stay fresh and delicious for as long as possible. By following these guidelines, you can extend the shelf life and maintain the quality of your frozen dough:
Storage Duration Guidelines
- Standard Shelf Life: Frozen cookie dough can typically be stored for up to 3 months without significant loss in quality. However, it’s best to consume it within the first 1-2 months for optimal flavor and texture.
- For longer storage periods, consider using a vacuum sealer to remove air and minimize the risk of freezer burn. This can help extend the shelf life up to 6 months or even longer if stored in a deep freezer.
Avoiding Freezer Burn and Flavor Loss
Freezer burn—a nemesis we all dread. To protect your cookie dough from this unappetizing fate, take the following precautions:
- Ensure your containers or bags are air-tight to prevent moisture loss and freezer burn.
- Avoid temperature fluctuations by keeping the freezer door closed as much as possible.
- Place your dough containers away from the freezer door and in a consistent temperature zone. This helps minimize exposure to warm air when the freezer is opened.
Rotating Cookie Dough Inventory
To maintain freshness and avoid letting your precious cookie dough go to waste, it’s a good practice to rotate your inventory. Follow these steps:
- Use a first-in, first-out system: Place newly prepared dough at the back of the freezer and move older dough to the front.
- Label your containers or bags with the date of freezing. This makes it easier to identify which batch to use first.
Remember, your frozen cookie dough is an investment in future cookie happiness. Treat it with care, and it will reward you with mouthwatering treats whenever you desire.
Now that we’ve covered the art of freezing, thawing, and extending the shelf life of cookie dough, it’s time to unleash the baking magic!
Baking Frozen Cookie Dough
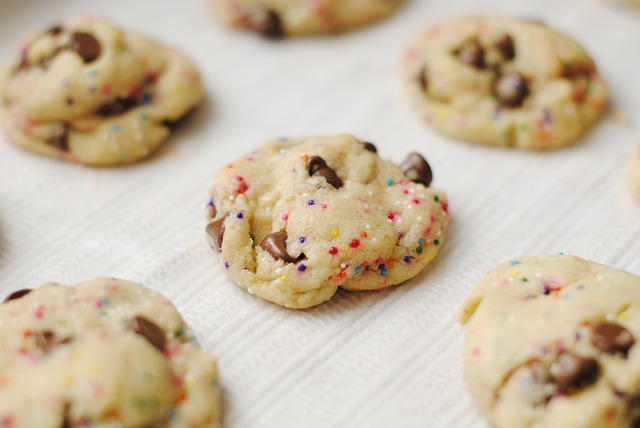
Baking frozen cookie dough is like watching a magic trick—the transformation from frozen orbs to golden delights is a sight to behold. Let’s explore the steps to achieve cookie perfection:
A. Preheating the Oven and Preparing the Baking Sheet
- Preheat your oven to the recommended temperature as specified in your cookie recipe. This ensures even baking and that coveted golden brown color.
- Line your baking sheet with parchment paper or a silicone baking mat. This prevents sticking and makes cleanup a breeze. Plus, it adds an extra touch of professionalism to your baking endeavors.
Baking Time and Temperature Adjustments
When baking frozen cookie dough, slight adjustments to time and temperature are necessary to account for the dough’s frozen state. Here’s a general guideline:
- Increase baking time: Add an additional 2-4 minutes to the original recipe’s baking time. This allows the frozen dough to thaw and bake through completely.
- Monitor doneness: Keep an eye on the cookies while they’re baking. They are ready when the edges are golden brown, and the centers are set. The cookies might appear slightly puffed initially but will flatten as they cool.
Tips for Achieving Perfectly Baked Cookies
To elevate your baking game and achieve cookie nirvana, consider these tips:
- Allow the frozen dough to thaw slightly at room temperature for around 10-15 minutes before baking. This helps the cookies spread and ensures even baking.
- Space the dough balls adequately on the baking sheet, considering their expected spread. Crowded cookies lead to uneven baking and potential merging into one giant cookie (which might not be a bad thing, depending on your preferences).
- For extra crispy edges and a chewy center, slightly underbake the cookies. They will continue to set and firm up as they cool.
Now, put on your baker’s hat, preheat that oven, and let your frozen cookie dough take center stage in a symphony of aromas and flavors.
Creative Variations and Flavor Combinations
Now that you’ve mastered the art of freezing, thawing, and baking your chocolate chip cookie dough, it’s time to unleash your creativity! Let’s explore some exciting variations and flavor combinations to take your cookies to the next level:
Add-Ins and Mix-Ins
- Nuts: Enhance your cookies with a crunchy texture and nutty flavor by adding chopped walnuts, pecans, or almonds to the dough.
- Dried Fruits: For a delightful burst of sweetness, consider mixing in dried cranberries, raisins, or even chopped dried apricots.
- Chocolate Variations: Experiment with different types of chocolate chips or chunks. Try dark chocolate, white chocolate, milk chocolate, or even a combination for a heavenly medley of flavors.
- Flavored Extracts: Add a touch of sophistication with a splash of vanilla extract, almond extract, or even mint extract for a refreshing twist.
- Candies and Treats: Get playful with your mix-ins by incorporating crushed candy canes, toffee bits, chopped Oreos, or mini marshmallows for a fun surprise in every bite.
Cookie Dough Combos
- The Ultimate Duo: Combine chocolate chip cookie dough with peanut butter cookie dough for a match made in dessert heaven. Swirl the two together or create marbled cookies for a delightful visual and flavorful experience.
- Double Trouble: Mix in chunks of dark chocolate and white chocolate to create a rich and decadent cookie dough that satisfies both chocolate lovers and vanilla enthusiasts.
- S’mores Inspired: Add graham cracker crumbs, mini marshmallows, and chocolate chunks to the dough for a cookie reminiscent of everyone’s favorite campfire treat.
Feel free to mix and match these ideas or come up with your own flavor combinations. Let your taste buds guide you on this delicious adventure!
Ready, Set, Bake!
Congratulations! You are now armed with the knowledge and tips to freeze chocolate chip cookie dough like a pro. From the initial preparation to the baking process, you’ve learned the ins and outs of preserving the dough’s quality, extending its shelf life, and achieving perfectly baked cookies.
Remember, freezing cookie dough not only offers convenience but also allows you to enjoy freshly baked cookies whenever the craving strikes. Whether you’re an avid baker or just a cookie enthusiast, these tips will ensure your frozen cookie dough delivers exceptional results every time.
So, go ahead and stock up on that chocolate chip cookie dough. Your future self will thank you when you’re indulging in warm, gooey cookies without all the hassle. Happy baking and freezing!
Note: While this article provides detailed guidance, always refer to specific recipe instructions and adapt them accordingly when freezing and baking your cookie dough.