
Buckle up and get ready for a hilarious and mouth-watering adventure into the world of chocolate chip cookie cups. This guide will leave you craving more and armed with the knowledge to create scrumptious treats that will impress even the most discerning cookie connoisseurs.
Captivating the Sweet Tooth
Are you ready to embark on a delectable journey through the land of chocolate chip cookie cups? Brace yourself for an article that will have your taste buds tingling and your inner baker jumping for joy.
Picture this: warm, chewy cookies with a delightful twist—they’re shaped like little cups! Chocolate chip cookie cups have taken the baking world by storm, offering a unique and scrumptious twist on the classic treat.
Whether you’re a baking enthusiast looking to expand your repertoire or a dessert lover seeking an exciting and indulgent delight, this ultimate guide is your ticket to cookie cup perfection.
Get your aprons on, gather your ingredients, and prepare to learn the art of creating irresistibly delicious chocolate chip cookie cups that will make you the star of any gathering.
Understanding Chocolate Chip Cookie Cups
What are Chocolate Chip Cookie Cups?
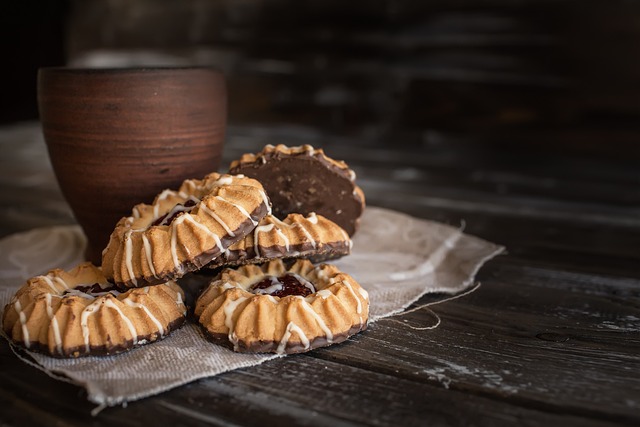
In the world of baking, there’s a whimsical creation that takes the humble chocolate chip cookie to new heights. Chocolate chip cookie cups are delightful little treats that take the form of miniature cups. These edible vessels boast a soft and chewy interior, filled with the perfect balance of chocolate chips and cookie goodness.
Just imagine the joy of sinking your teeth into a warm and gooey cookie cup, savoring the blend of buttery dough and rich, melted chocolate. These delectable creations are a delightful twist on traditional cookies and are sure to bring smiles to the faces of all who indulge.
Popular Variations of Chocolate Chip Cookie Cups
Now, let’s talk about the versatility of chocolate chip cookie cups. Like a chameleon of the dessert world, these cups can adapt to various tastes and preferences. Whether you’re gluten-free, seeking a mini-sized treat, or looking to surprise your guests with a delightful filling, there’s a chocolate chip cookie cup variation for you.
- Stuffed Cookie Cups: Take your chocolate chip cookie cups to the next level by adding a surprise filling. Think gooey caramel, creamy Nutella, or even a dollop of peanut butter hidden inside. These stuffed cookie cups will bring smiles and excitement with every bite.
- Mini Cookie Cups: Looking for bite-sized treats that pack a punch? Mini cookie cups are perfect for snacking or serving at parties. Their miniature size offers an irresistible poppable experience, ensuring that no one can eat just one.
- Gluten-Free Options: Don’t let dietary restrictions hold you back from enjoying the wonders of chocolate chip cookie cups. There are numerous gluten-free recipes available, often utilizing alternative flours such as almond flour or oat flour, ensuring everyone can join in on the indulgence.
Ingredients and Equipment Needed
Before diving into the doughy goodness, let’s gather our ingredients and make sure we have the necessary equipment. Here’s what you’ll need to bring your chocolate chip cookie cup dreams to life:
Ingredients:
- Flour: All-purpose flour is the go-to for most chocolate chip cookie cup recipes, but feel free to experiment with different types of flour, such as whole wheat or almond flour, for unique flavors and textures.
- Sugar: Granulated sugar and brown sugar are the dynamic duo that lend sweetness and moisture to your cookie cups. A blend of both sugars adds depth of flavor and richness.
- Butter: Unsalted butter is typically used in cookie cup recipes, providing that irresistible buttery goodness. Be sure to use softened butter for easy mixing.
- Chocolate Chips: The star of the show! Opt for high-quality chocolate chips or chunks, ensuring they melt into ooey-gooey pockets of chocolatey heaven.
- Eggs: Essential for binding the dough together and adding moisture. Make sure your eggs are at room temperature.
- Vanilla Extract: A splash of vanilla extract enhances the overall flavor profile of your cookie cups. Don’t be shy with it!
- Salt: A pinch of salt balances the sweetness and intensifies the flavors.
Equipment:
- Muffin Tin: A standard muffin tin is the most common tool for creating chocolate chip cookie cups. Make sure it’s clean and greased before use.
- Parchment Paper: If you prefer easy removal or have a non-stick aversion, line the muffin tin with parchment paper for hassle-free cookie cup extraction.
Now that we have our ingredients and equipment at the ready, it’s time to dive into the delightful world of cookie cup creation. Stay tuned for the next section, where we’ll explore the art of preparing the dough with precision and love.
Preparing the Dough
Now that we have our ingredients lined up like eager participants in a cookie cup extravaganza, it’s time to roll up our sleeves and prepare the dough. Get ready to embark on a mixing adventure that will result in a dough so delectable, you’ll be tempted to eat it straight from the bowl (but please resist, as raw cookie dough can be risky business).
Gathering the Ingredients
Before we dive into the mixing process, let’s gather our ingredients and ensure we have everything in place. Double-check that your pantry is stocked with the following:
- 2 ¼ cups of all-purpose flour
- 1 teaspoon of baking soda
- ½ teaspoon of salt
- 1 cup (2 sticks) of unsalted butter, softened
- ¾ cup of granulated sugar
- ¾ cup of packed brown sugar
- 2 large eggs, at room temperature
- 1 teaspoon of pure vanilla extract
- 2 cups of chocolate chips
Mixing the Dough
- Preheat the oven. Before we dive into the mixing madness, let’s make sure our oven is preheated to 350°F (175°C). This will ensure the perfect temperature for baking our cookie cups to golden perfection.
- Sift the dry ingredients. In a medium-sized bowl, combine the flour, baking soda, and salt. Give it a good whisk or sift to ensure the ingredients are evenly distributed and any lumps are banished.
- Cream the butter and sugars. In a large mixing bowl, using an electric mixer or some good old-fashioned elbow grease, cream together the softened butter, granulated sugar, and packed brown sugar until light and fluffy. This step is crucial for achieving that irresistibly tender texture.
- Add the eggs and vanilla extract. Crack those room temperature eggs into the bowl, one at a time, ensuring they are well incorporated. Then, add in the vanilla extract and give it a good mix. Ah, the sweet aroma of vanilla filling the air!
- Gradually add the dry ingredients. Now comes the fun part. Gradually add the dry ingredient mixture to the bowl, mixing on low speed or gently folding it in with a spatula until just combined. Overmixing can result in tough cookie cups, and nobody wants that!
- Fold in the chocolate chips. Ah, the crowning jewel of our cookie cups—the chocolate chips. Pour in those glorious morsels of chocolatey goodness and fold them into the dough with love and precision. Make sure they’re evenly distributed, ensuring a delightful chocolate surprise in every bite.
- Chill the dough. This step requires a little patience, but trust us—it’s worth it. Cover the dough with plastic wrap and let it chill in the refrigerator for at least 30 minutes. Chilled dough results in cookies with a better shape and texture, preventing excessive spreading during baking.
Incorporating Chocolate Chips
When it comes to chocolate chip distribution in our cookie cups, we want to ensure each bite is a harmonious blend of dough and chocolatey goodness. Here are some tips for incorporating those delightful morsels into your dough:
- Go for a variety: Experiment with different types of chocolate chips—milk chocolate, dark chocolate, white chocolate, or even a combination. Each variety brings its unique flavor profile to the table.
- Add them gradually: To achieve an even distribution of chocolate chips throughout the dough, add them gradually. Sprinkle some in, mix, add some more, and repeat until your dough is speckled with chocolatey delight.
- Save some for the topping: For an extra touch of chocolatey indulgence, reserve a handful of chocolate chips to sprinkle on top of the cookie cups before baking. It adds visual appeal and ensures a burst of chocolate in every bite.
With our dough mixed to perfection, we’re ready to move on to the next stage of our chocolate chip cookie cup adventure—shaping and baking these delectable treats. Get your oven mitts ready!
Shaping and Baking the Cookie Cups
Now that our dough is chilled and brimming with anticipation, it’s time to shape these cookie cups into irresistible little masterpieces and let the oven work its magic. Get ready for a transformation that will leave you in awe of your baking prowess!
Preheating the Oven
- Preheat to perfection. Before we begin shaping our cookie cups, preheat the oven to 350°F (175°C). This ensures that our precious creations bake at just the right temperature for that golden brown perfection.
Preparing the Baking Surface
- Grease or line the muffin tin. To ensure our cookie cups don’t stick and are easily released, grease the muffin tin with butter or cooking spray. Alternatively, you can line the tin with cupcake liners for effortless removal and a touch of aesthetic appeal.
- Shape the dough into balls. Take a portion of the chilled dough and roll it into a ball, about the size of a golf ball. Repeat this process until you have the desired number of dough balls, depending on the size and quantity of cookie cups you wish to make.
Shaping the Cookie Cups
- Press the dough into the muffin tin. Take each dough ball and gently press it into the wells of the prepared muffin tin. Use your fingers or the back of a spoon to shape the dough, ensuring it spreads evenly along the sides and bottom, creating a well for our luscious fillings later on.
- Create a cup shape. To transform our dough into true cookie cups, press the dough up along the sides of the muffin tin, creating a cup-like shape. Ensure the walls of the cups are even in thickness, allowing for a sturdy vessel to hold our delightful fillings.
- Smooth the edges. Use your fingers or a small spatula to smooth the edges of the cookie cups, ensuring they have a polished appearance. A neat and tidy cup will be a visual delight when served to friends and family.
- Optional: Create a well in the center. For a more defined well in the center of the cookie cups, you can gently press the dough down with your thumb or the back of a spoon. This will create a space for the fillings to nestle in, providing a delightful surprise with each bite.
Baking Time and Temperature
- Into the oven they go. Carefully place the muffin tin filled with our glorious cookie cups into the preheated oven. Be sure to position it in the center of the oven for even baking.
- Baking time and temperature. Bake the cookie cups at 350°F (175°C) for approximately 12-15 minutes, or until the edges turn a beautiful golden brown. The baking time may vary depending on your oven and the desired level of chewiness or crispiness you prefer.
- The golden rule of patience. As the aroma of freshly baked cookies fills your kitchen, it’s essential to resist the temptation to immediately devour these delectable treats. Allow the cookie cups to cool in the muffin tin for about 10 minutes, as they continue to set and firm up during this time.
- Cooling on a wire rack. After the initial cooling period, gently transfer the cookie cups to a wire rack using a small spatula or fork. Let them cool completely on the wire rack before filling or serving. This ensures the cups maintain their shape and structural integrity.
Once our cookie cups have cooled to perfection, we can proceed to the most exciting part—filling them with a medley of delectable fillings. Join me in the next section as we explore endless possibilities to elevate the flavor and add that extra touch of sweetness!
Filling the Cookie Cups with Deliciousness
Congratulations! You’ve successfully baked a batch of mouthwatering chocolate chip cookie cups. Now it’s time to unleash your creativity and fill these delectable cups with a variety of delightful fillings. Prepare yourself for a symphony of flavors and textures that will tantalize your taste buds.
Sweet Fillings
- Classic Chocolate Ganache: Indulge in a velvety smooth chocolate ganache that complements the chocolate chip cookie base perfectly. Simply heat heavy cream and pour it over finely chopped chocolate. Let it sit for a few minutes, then stir until the chocolate is melted and the ganache is glossy. Fill each cookie cup with a generous dollop of ganache and let it set.
- Creamy Peanut Butter: For peanut butter lovers, fill the cookie cups with creamy peanut butter. You can also mix in a touch of powdered sugar to enhance the sweetness and texture. Top it off with a sprinkle of crushed peanuts for added crunch and visual appeal.
- Fruit Preserves: Add a burst of fruity goodness by filling the cookie cups with your favorite fruit preserves. Strawberry, raspberry, or apricot preserves work beautifully, providing a sweet and tangy contrast to the rich cookie base.
- Caramel Drizzle: Drizzle a luscious caramel sauce over the cookie cups, creating a decadent treat reminiscent of caramel chocolate chip cookies. Opt for store-bought caramel sauce or make your own by heating sugar until it caramelizes, then adding cream and butter for a smooth consistency.
Creamy Fillings
- Whipped Cream: Top the cookie cups with a generous swirl of freshly whipped cream for a light and airy filling. You can add a hint of vanilla or a touch of powdered sugar to the cream for added flavor. Sprinkle some chocolate shavings or a dusting of cocoa powder on top for a delightful finishing touch.
- Chocolate Mousse: Prepare a luxurious chocolate mousse and pipe it into the cookie cups for an elegant dessert. Whip together melted chocolate, egg yolks, sugar, and whipped cream until light and fluffy. Spoon or pipe the mousse into the cups, and refrigerate until set.
- Cream Cheese Frosting: Indulge in the creamy goodness of cream cheese frosting. Beat together cream cheese, butter, powdered sugar, and vanilla extract until smooth and creamy. Pipe or spread the frosting into the cookie cups, creating a delightful contrast between the tangy cream cheese and the sweet cookie base.
- Flavored Whipped Cream: Elevate your cookie cups with flavored whipped cream. Add a twist of mint, a hint of almond, or a dash of coffee extract to the whipped cream before piping it into the cups. Experiment with different flavors to create a personalized touch.
Fruity Fillings
- Fresh Berries: Fill the cookie cups with a medley of fresh berries, such as strawberries, blueberries, raspberries, or blackberries. Their natural sweetness and vibrant colors make for a refreshing and visually appealing filling. You can also sprinkle a dusting of powdered sugar on top for an added touch of elegance.
- Citrus Curd: Prepare a zesty lemon, lime, or orange curd to fill the cookie cups. The bright citrus flavors will provide a delightful contrast to the richness of the cookie base. Fill the cups with the curd and garnish with a twist of citrus zest for a burst of freshness.
- Fruit Salad: Create a mini fruit salad by combining diced fruits like kiwi, pineapple, mango, and melon. Fill the cookie cups with this vibrant and juicy mixture, creating a refreshing and healthy dessert option.
Ice Cream Fillings
- Vanilla Bean Ice Cream: Scoop a generous serving of creamy vanilla bean ice cream into the cookie cups. The combination of warm, gooey cookie cups and cold, luscious ice cream creates a heavenly dessert experience. Top it off with a drizzle of hot fudge or a sprinkle of crushed cookies for an extra indulgence.
- Mint Chocolate Chip Ice Cream: Indulge in a classic combination by filling the cookie cups with mint chocolate chip ice cream. The cool, refreshing mint flavor with bursts of chocolate will take your taste buds on a delightful journey.
- Caramel Swirl Ice Cream: Fill the cookie cups with creamy caramel swirl ice cream, creating a divine blend of flavors. Drizzle some caramel sauce on top and sprinkle a few sea salt flakes for a touch of sophistication and a delightful sweet-salty balance.
Now that you have an arsenal of filling options, let your imagination run wild and create your own flavor combinations. Experiment, have fun, and enjoy the endless possibilities these cookie cups have to offer. Bon appétit!
Serving and Storing Chocolate Chip Cookie Cups
You’ve filled your chocolate chip cookie cups with delectable fillings, and now it’s time to present them to your eager audience. Whether it’s a casual gathering, a special occasion, or a delightful treat for yourself, serving these cookie cups with style will elevate the experience. Let’s explore serving suggestions and learn how to store these delectable treats for maximum enjoyment.
Serving Suggestions
Garnish with Delight: Spruce up your cookie cups with a variety of garnishes to add visual appeal and extra flavor. Here are some ideas:
- Fresh mint leaves for a pop of color and a hint of freshness.
- Sprinkles or colored sugar for a festive touch.
- Crushed nuts, such as walnuts or almonds, for added crunch.
- Chocolate shavings or cocoa powder for a touch of elegance.
Accompanying Delicacies: Pair your cookie cups with complementary treats to create a dessert spread that will impress your guests. Consider serving them with:
- A scoop of your favorite ice cream on the side.
- A drizzle of hot fudge or caramel sauce for added indulgence.
- Fresh berries or fruit salad for a refreshing contrast.
- A piping hot cup of coffee or a glass of cold milk for a classic combination.
Presentation is Key: Display your cookie cups on a beautiful dessert platter or individual serving plates. Consider adding decorative elements like edible flowers or a dusting of powdered sugar for a touch of elegance. Let your creativity shine as you present these delightful treats.
Storing Chocolate Chip Cookie Cups
- Short-Term Storage: If you plan to enjoy your cookie cups within a day or two, store them in an airtight container at room temperature. Line the container with parchment paper to prevent sticking and stack the cookie cups carefully, placing a sheet of parchment paper between each layer to avoid any potential damage.
- Freezing Cookie Cups: To store cookie cups for longer periods, they can be frozen:
- Individually Wrap: Wrap each cookie cup tightly in plastic wrap or place them in individual zip-top bags.
- Layering: Place the individually wrapped cookie cups in a freezer-safe container, separating each layer with parchment paper.
- Labeling: Don’t forget to label the container with the date to keep track of freshness.
- Thawing: When ready to enjoy, remove the desired number of cookie cups from the freezer and let them thaw at room temperature for about 15-20 minutes.
Refreshing Frozen Cookie Cups: To refresh the texture and flavor of frozen cookie cups, you can warm them in a preheated oven at 350°F (175°C) for a few minutes until they are heated through. This will restore the gooey, freshly baked texture and revive the delightful aroma.
Now that you have mastered the art of serving and storing chocolate chip cookie cups, you can confidently share these delectable treats with friends, family, or simply indulge in a moment of pure bliss on your own. Enjoy the magic you’ve created, and savor every bite!
Tips and Tricks for Perfect Chocolate Chip Cookie Cups
Creating perfect chocolate chip cookie cups requires attention to detail and a few insider tips and tricks. Let’s dive into some expert advice that will help you achieve cookie cup greatness every time.
Dough Preparation
- Chill the Dough: One of the secrets to achieving the perfect texture and shape is to chill the dough before shaping it into cookie cups. This allows the fats in the dough to solidify, resulting in cookies that spread less and hold their shape better during baking.
- Uniform Dough Balls: When portioning the dough, ensure that each dough ball is roughly the same size. This ensures even baking and consistent cookie cup sizes.
Shaping and Baking
- Gentle Pressing: When pressing the dough into the muffin tin, use a gentle touch to avoid overworking the dough. Pressing too hard can result in dense and tough cookie cups.
- Even Wall Thickness: When shaping the dough up along the sides of the muffin tin, strive for even wall thickness. This ensures that the cookie cups bake uniformly and have a pleasing appearance.
- Avoid Overbaking: Keep a close eye on the cookie cups while they are in the oven. Overbaking can result in dry and crumbly cups. Remove them from the oven when the edges are golden brown, but the centers are still slightly soft.
Filling and Presentation
- Cooling Time: Allow the cookie cups to cool in the muffin tin for about 10 minutes before transferring them to a wire rack. This cooling period helps them set and firm up, making them easier to handle.
- Filling After Cooling: Fill the cookie cups only after they have cooled completely. This prevents the fillings from melting or losing their structure.
- Creativity with Fillings: Don’t be afraid to get creative with your fillings! Experiment with different combinations, textures, and flavors to make each batch of cookie cups unique and exciting.
Storage and Reheating
- Proper Storage: Store the cookie cups in an airtight container at room temperature for short-term consumption. For longer storage, follow the freezing instructions mentioned earlier.
- Reheating: When reheating frozen cookie cups, avoid using the microwave as it can make them soggy. Instead, opt for gently warming them in a preheated oven to restore their delightful texture.
Enjoy the Process
- Have Fun: Baking is a joyful experience, so embrace the process and have fun while creating these cookie cups. Let your creativity shine and enjoy the delicious results.
- Share and Indulge: Share your creations with loved ones and enjoy the smiles and compliments that come with serving these delightful treats. Don’t forget to save a few for yourself to savor later.
By following these tips and tricks, you’ll become a master of chocolate chip cookie cups and delight in the scrumptious results each time you bake them. Happy baking!
Troubleshooting Common Issues with Chocolate Chip Cookie Cups
Sometimes, even the most experienced bakers encounter challenges. But fear not! In this section, we’ll address common issues that may arise when making chocolate chip cookie cups and provide you with solutions to overcome them.
Issue: Cookie Cups Spread Too Much
Possible Causes:
- The dough was too warm when placed in the oven.
- Insufficient chilling time for the dough.
Solutions:
- Refrigerate the dough for a longer period before shaping and baking.
- Ensure the dough is properly chilled before baking.
- Place the shaped dough in the refrigerator for a few minutes before baking if it becomes too soft.
Issue: Cookie Cups Stick to the Pan
Possible Causes:
- Insufficient greasing of the muffin tin.
- Inadequate cooling time before removing the cookie cups.
Solutions:
- Grease the muffin tin thoroughly, ensuring to coat the sides and bottoms.
- Allow the cookie cups to cool in the muffin tin for the recommended time before attempting to remove them.
Issue: Cookie Cups are Dry or Overbaked
Possible Causes:
- Excessive baking time.
- Oven temperature too high.
Solutions:
- Reduce the baking time and monitor the cookie cups closely.
- Check the accuracy of your oven temperature with an oven thermometer.
- Consider lowering the oven temperature slightly for future batches.
Issue: Cookie Cups Collapse or Lose Shape
Possible Causes:
- Insufficient dough pressed into the muffin tin.
- Inadequate chilling time for the dough.
Solutions:
- Ensure you press enough dough into the muffin tin, forming a solid base and walls.
- Chill the dough adequately before shaping and baking.
Issue: Filling Melts or Runs Over
Possible Causes:
- The filling was added while the cookie cups were still warm.
- The filling has a low melting point.
Solutions:
- Allow the cookie cups to cool completely before adding the filling.
- Choose fillings that have a higher heat resistance or stability.
Issue: Cookie Cups Have Uneven Texture
Possible Causes:
- Inconsistent mixing of the dough.
- Uneven distribution of ingredients.
Solutions:
- Ensure thorough mixing of all the ingredients, avoiding pockets of unmixed flour or other ingredients.
- Carefully fold in the chocolate chips or any other mix-ins to ensure even distribution throughout the dough.
With these troubleshooting tips at your disposal, you can overcome any challenges that may arise during your chocolate chip cookie cup adventures. Don’t be discouraged by setbacks; instead, embrace them as opportunities to learn and grow as a baker. Happy baking, and may your cookie cups always turn out wonderfully!
Indulge in the Delightful World of Chocolate Chip Cookie Cups
Congratulations! You’ve reached the end of this comprehensive guide to making chocolate chip cookie cups. We’ve covered everything from the basics of the recipe to troubleshooting common issues. Now it’s time to reflect on your baking journey and inspire you to continue exploring the delightful world of cookie cups.
Throughout this article, we’ve discovered the joy of baking, the magic of chocolate chip cookies, and the creative possibilities of transforming them into delightful cups filled with deliciousness. Let’s recap some key takeaways:
- Versatile and Fun: Chocolate chip cookie cups offer a versatile canvas for endless flavor combinations and fillings. From classic chocolate chips to decadent caramel and everything in between, the choices are only limited by your imagination.
- Aesthetically Pleasing: The charming appearance of cookie cups adds a touch of elegance and sophistication to your dessert table. With their beautifully molded shape and delectable fillings, they are sure to impress your guests and satisfy their sweet cravings.
- Baking Expertise: The process of making cookie cups allows you to hone your baking skills. From dough preparation and shaping to perfect baking and creative fillings, each step presents an opportunity to refine your techniques and explore new flavors.
- Customizable Treats: Cookie cups can be customized to suit various occasions and preferences. Whether you’re baking for a birthday party, a holiday gathering, or a cozy evening at home, you can adapt the flavors, fillings, and presentations to create a memorable treat.
- Creativity Unleashed: Don’t be afraid to experiment and let your creativity shine. Add unique twists to the classic recipe, incorporate different mix-ins, or explore unconventional fillings. The journey of baking is a continuous learning experience, and the possibilities are endless.
As you embark on your own chocolate chip cookie cup adventures, remember to enjoy the process. Baking is not just about the final result but also about the joy, satisfaction, and fulfillment it brings. Embrace the aromas, the textures, the flavors, and the stories that unfold with each batch you create.
So go forth, armed with the knowledge, tips, and tricks from this guide. Be bold, be daring, and most importantly, be delicious! The world of chocolate chip cookie cups awaits your creative touch. Happy baking!