
Hey there, fellow snack enthusiasts! Are you ready to embark on a mouthwatering adventure that combines the best of chocolate chip cookies and granola bars? Well, you’ve come to the right place! In this hilarious and informative guide, I’ll walk you through the delightful process of making your own irresistible chocolate chip cookie granola bars. Get ready to unleash your inner baking maestro and indulge in a treat that will make your taste buds dance with joy!
Understanding Chocolate Chip Cookie Granola Bars
Definition and Composition: Where Cookies and Granola Bars Collide
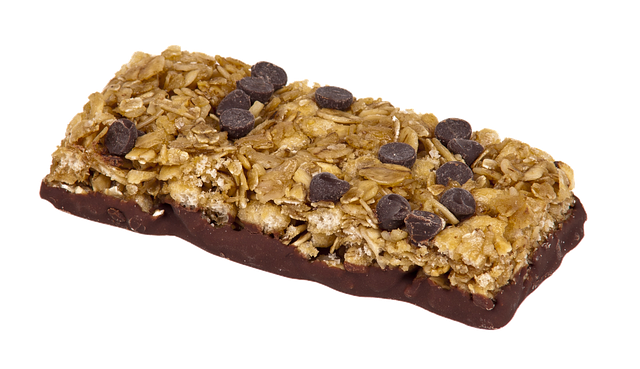
Chocolate chip cookie granola bars are the glorious result of a sweet marriage between two beloved snacks. Picture this: soft, chewy cookies packed with oats, delightful chocolate chips, and an assortment of other goodies like nuts or dried fruits. It’s like your favorite cookie went on a health kick and transformed into a convenient, portable treat!
Now, these delectable bars come in various forms, but the basic building blocks remain the same. The star ingredients include rolled oats, those little morsels of chocolaty heaven, honey (or other sweeteners), and a medley of nuts or dried fruits for added crunch and flavor. The combination of these components ensures a tantalizing texture and a burst of delightful tastes in every bite.
Nutritional Value: Guilt-Free Bliss
Let’s talk about the guilt-free aspect of these scrumptious treats. Chocolate chip cookie granola bars aren’t just about indulgence; they also offer some nutritional value. Packed with fiber from the oats, protein from the nuts, and a dose of healthy fats, these bars provide a balanced snacking option that can keep you fueled throughout the day.
Plus, you get to control the ingredients! Don’t like certain nuts? No problem, skip ’em! Want to amp up the fiber content? Add some flaxseeds or chia seeds to the mix! The beauty of making your own chocolate chip cookie granola bars is that you can customize them to suit your taste preferences and dietary needs.
Gathering the Ingredients: The Quest for Snack Perfection
Oats: The Heart and Soul of Granola Bars
Ah, oats, the unsung heroes of the granola bar world! Rolled oats are the foundation upon which these scrumptious treats are built. They provide a satisfying chewiness and act as a canvas for all the other flavors to shine.
Now, when it comes to oats, quality matters. Look for good old-fashioned rolled oats, avoiding instant or quick oats, as they can alter the texture of your bars. And hey, if you’re on a gluten-free journey, fear not! There are plenty of gluten-free oats available for you to enjoy these goodies without any worries.
Sweeteners: The Glue That Holds It All Together
Time to sweeten the deal! When it comes to chocolate chip cookie granola bars, sweeteners play a vital role in binding all the ingredients together. Honey, maple syrup, or agave nectar—take your pick! These liquid sweeteners bring both sweetness and cohesiveness to the mix.
Now, I must admit, finding the perfect balance of sweeteners is an art form. Too little, and your bars may crumble like a Jenga tower; too much, and you’ll end up with a sticky mess that could rival a flytrap. So, measure carefully and taste along the way to achieve that sweet spot of perfection.
Mix-ins: The Flavorful Twist
Ah, the mix-ins! This is where your creative baking genius truly shines. Chocolate chips, dried fruits, nuts, or even a sprinkle of coconut flakes—these little delights elevate your chocolate chip cookie granola bars to new heights of flavor and texture.
Now, there are no hard and fast rules when it comes to mix-ins. Go with your gut (and your taste buds) to choose the combinations that speak to you. Want a classic combo? Chocolate chips and walnuts will never let you down. Feeling adventurous? Try cranberries and pistachios for a tangy, nutty delight. The world is your mix-in oyster!
Stay tuned for the next sections as we delve deeper into the art of crafting these incredible chocolate chip cookie granola bars. We’ll guide you through preparing the base, combining the ingredients, baking to perfection, customization options, storage tips, and more! Get ready for a baking extravaganza that will have your friends and family begging for more.
Preparing the Base: Laying the Foundation for Deliciousness
Before we dive into the nitty-gritty of creating your chocolate chip cookie granola bars, let’s focus on preparing the base—the fundamental mixture that holds everything together.
Mixing the Dry Ingredients: Creating the Perfect Harmony
- Start by gathering the dry ingredients: rolled oats, all-purpose flour (or a suitable alternative for gluten-free options), baking soda, and a pinch of salt.
- In a large mixing bowl, combine the dry ingredients and whisk them together to ensure even distribution. This step is crucial for achieving a consistent texture in your bars.
- Feel free to get creative with your dry ingredient choices. Want to add a hint of warmth? Sprinkle in some cinnamon or nutmeg for that cozy, comforting touch. Remember, baking is an adventure, so embrace your inner flavor explorer!
Preparing the Wet Ingredients: Melting Hearts, Not Butter
- Time to get your wet ingredients ready! Melt unsalted butter or coconut oil (about 1/2 to 3/4 cup, depending on your preference) in a microwave-safe bowl or on the stovetop. Keep an eye on it and make sure it doesn’t turn into a buttery volcano eruption.
- Once your butter is melted, add your chosen sweetener (such as honey or maple syrup) to the mix. This sticky addition brings the sweetness and acts as the glue that binds your ingredients together.
- Mix the melted butter (or coconut oil) and sweetener until well combined. The result should be a smooth and luscious liquid that tempts you to dip your finger in (but resist, my friend, for the deliciousness is yet to come!).
Marrying the Dry and Wet: A Match Made in Snack Heaven
- It’s time to bring the party together! Gradually pour the wet ingredients into the bowl with the dry ingredients. Use a sturdy spoon or spatula to mix everything until it forms a cohesive mixture.
- You want to achieve a consistency that holds its shape when pressed together but isn’t overly sticky. If the mixture feels too dry, add a tablespoon or two of additional melted butter or honey. If it’s too sticky, sprinkle in a bit more oats or flour until you reach the desired texture.
- Take a moment to marvel at the beautiful dough you’ve created—a harmonious blend of oats, sweetness, and a touch of magic. It’s time to move on to the next step: pressing the mixture into a baking pan or mold.
Combining and Baking: Transforming Dough into Bars of Wonder
Incorporating the Wet and Dry Ingredients: Mix, Mix, Mix (but not too much!)
- As you pour the wet ingredients into the dry mixture, get ready for the most satisfying part—combining the two. Use your sturdy spoon or spatula to gently mix everything together until no dry pockets remain.
- Be mindful not to overmix the dough, my baking apprentice! Overmixing can lead to tough, dense bars instead of the soft and chewy goodness we’re aiming for. So, mix just until the ingredients are fully incorporated, and you’re good to go!
Pressing the Mixture: Squish It Real Good
- Line a baking pan or mold with parchment paper or grease it lightly with cooking spray to prevent sticking. This step will make your life easier when it comes time to remove and cut the bars.
- Transfer the dough mixture to the prepared pan and press it firmly and evenly into place. You can use the back of a spoon or your slightly moistened fingers (don’t worry, no one’s judging!) to smooth out the surface and ensure a uniform thickness.
- Want thicker bars? Use a smaller pan and press the dough more compactly. Prefer thinner bars? Opt for a larger pan and spread the dough out more thinly. You’re the master of your granola bar destiny!
Baking and Cooling: The Waiting Game Begins
- Preheat your oven to 350°F (175°C) and place the pan of dough in the center. Let the magic happen as the aroma of freshly baked treats begins to fill your kitchen.
- Bake the chocolate chip cookie granola bars for about 20-25 minutes, or until they turn a beautiful golden brown around the edges. Remember, every oven is unique, so keep an eye on them to avoid any burnt surprises.
- Once your bars have achieved the perfect level of golden goodness, remove them from the oven and let them cool completely in the pan. This cooling period allows the bars to set and develop their signature chewy texture. Patience, my friend, for the reward is near!
Now that your chocolate chip cookie granola bars are baking to perfection, we’ll take a short break. In the next sections, we’ll explore customization and flavor variations, dietary modifications, storage recommendations, serving suggestions, and more. So, grab a cup of your favorite beverage, relax, and get ready for the tantalizing continuation of our granola bar adventure!
Customization and Flavor Variations: Unleash Your Inner Granola Bar Artist
Adding a Touch of Creativity: Personalizing Your Bars
One of the joys of making your own chocolate chip cookie granola bars is the ability to customize them to suit your taste preferences. Here are some ideas to spark your creative baking spirit:
- Flavor Extravaganza: Experiment with different extracts like vanilla, almond, or even coconut to enhance the overall flavor profile of your bars.
- Spice it Up: Sprinkle in a dash of your favorite spices—cinnamon, nutmeg, or even a pinch of cardamom—for an extra layer of aromatic delight.
- Super Seeds: Boost the nutritional value by incorporating nutritious seeds like chia, flax, or hemp seeds into the mix. These tiny powerhouses add a delightful crunch and pack a punch of Omega-3 fatty acids.
- Protein Power: Add a scoop of your preferred protein powder for an extra protein boost. It’s a great way to make your snack more satiating and perfect for post-workout refueling.
- Sweet and Savory: Play with the balance of sweetness by adding a hint of sea salt or a sprinkle of coarse sugar on top. The contrast of flavors will leave your taste buds dancing with joy.
Don’t be afraid to let your imagination run wild and create your signature chocolate chip cookie granola bars. Remember, baking is an art, and you’re the artist!
Flavor Variations: The World of Endless Possibilities
Now, let’s explore some popular flavor variations that will take your chocolate chip cookie granola bars to new heights of deliciousness:
- Triple Chocolate Delight: Swap the regular chocolate chips for a mix of dark, milk, and white chocolate chips. Indulgence level: off the charts!
- Nutty Crunch: Add a generous handful of chopped almonds, pecans, or your favorite nuts to the mix. The combination of creamy chocolate and crunchy nuts is simply irresistible.
- Fruit Medley: Dried fruits like cranberries, cherries, or raisins bring a delightful burst of sweetness and tanginess to your bars. Experiment with different combinations to find your ultimate fruity paradise.
- S’mores Sensation: Channel your inner camper by adding mini marshmallows and crushed graham crackers to the dough. It’s like having a cozy campfire experience in every bite!
Feel free to mix and match these flavor variations or create your own unique combinations. The only limit is your imagination!
Dietary Modifications: Snacking for All
Gluten-Free Goodness: Embracing the Alternative
Good news for our gluten-sensitive friends—you can still enjoy the blissful indulgence of chocolate chip cookie granola bars! Here’s how to make them gluten-free:
- Oat Selection: Ensure you’re using certified gluten-free oats to avoid any cross-contamination issues.
- Flour Alternatives: Substitute the all-purpose flour with a gluten-free flour blend or opt for options like almond flour, coconut flour, or buckwheat flour for a unique twist.
- Binding Agents: Some gluten-free recipes benefit from the addition of xanthan gum or psyllium husk to improve the texture and binding properties.
With these simple modifications, you can create gluten-free chocolate chip cookie granola bars that are just as delectable as their gluten-filled counterparts.
Vegan-friendly Vibe: Plant-powered Treats
Vegans, rejoice! You too can partake in the chocolatey goodness of these granola bars. Here’s how to make them vegan-friendly:
- Butter Alternatives: Substitute the butter with a vegan butter spread or coconut oil for a dairy-free option.
- Sweeteners: Use plant-based sweeteners like maple syrup, agave nectar, or date syrup instead of honey.
- Egg Substitutes: In recipes that call for eggs, you can use substitutes such as mashed banana, applesauce, or flaxseed meal mixed with water to achieve the desired binding effect.
By making these adjustments, you’ll have vegan chocolate chip cookie granola bars that satisfy your cravings while aligning with your dietary choices.
Storage Tips: Keeping the Goodness Fresh
After all the baking excitement, you’ll want to ensure your chocolate chip cookie granola bars stay fresh and delicious for as long as possible. Here are some storage tips to keep in mind:
- Room Temperature: If you plan to consume the bars within a week, store them in an airtight container at room temperature. Ensure the bars are completely cooled before sealing them.
- Refrigeration: For longer shelf life, especially in warmer climates, refrigerate the bars in an airtight container. This helps maintain their texture and prevents any potential spoilage.
- Freezing: If you want to make a big batch or plan for future snacking, wrap the bars individually in plastic wrap or parchment paper and store them in a freezer-safe bag or container. They can stay frozen for up to 3 months.
Remember to label and date your containers, but let’s be honest—they probably won’t last that long because they’re just too irresistible!
Serving Suggestions: Delightful Ways to Enjoy Your Bars
On-the-Go Snacking: Fuel for Your Adventures
One of the beauties of chocolate chip cookie granola bars is their portability. They make a perfect snack for when you’re on the move. Here are some ideas for enjoying your bars on the go:
- Road Trip Bliss: Pack individually wrapped bars for a road trip. They’re a tasty and convenient option to keep you energized during long drives.
- Work or School Snack: Tuck a bar into your bag or lunchbox for a midday pick-me-up. It’s a delicious alternative to store-bought snacks and can help curb those afternoon cravings.
- Outdoor Adventures: Whether hiking, biking, or exploring nature, these bars make a fantastic companion. They provide a boost of energy and satisfy your sweet tooth while you enjoy the great outdoors.
With your chocolate chip cookie granola bars in hand, you’ll be ready to tackle any adventure that comes your way.
Dessert Indulgence: Elevating Your Sweet Tooth Satisfaction
Who says granola bars can’t be dessert-worthy? Transform your bars into a delightful dessert with these serving suggestions:
- Ice Cream Sandwich: Sandwich a scoop of your favorite ice cream between two bars for a delectable ice cream sandwich experience. It’s a heavenly treat that combines the best of both worlds.
- Crumble Topping: Crumble the bars over a bowl of vanilla ice cream or Greek yogurt for a crunchy and sweet topping. It adds a delightful texture and flavor contrast to your creamy dessert.
- Sundae Topping: Chop the bars into small pieces and sprinkle them over your favorite sundae creation. The chocolatey, chewy goodness will take your sundae to new heights.
These dessert variations showcase the versatility of your chocolate chip cookie granola bars and offer a satisfying treat for your sweet tooth.
Baking Memories to Last
In conclusion, crafting chocolate chip cookie granola bars is a delightful endeavor that combines the best of cookies and granola. By following the steps outlined in this guide, you’ll be well-equipped to create your own batch of chewy, chocolatey goodness.
Remember, baking is not only about the end result—it’s about the journey, the stories, and the joy of sharing your creations with others. So, embrace your inner baker, unleash your creativity, and let the magic of baking fill your home with warmth and deliciousness.
Now, go forth and embark on your granola bar adventure! May your kitchen be filled with the heavenly scent of chocolate chip cookies and may your taste buds dance with delight as you enjoy every bite of your homemade chocolate chip cookie granola bars. Happy baking!